For our Fourth major project for our introduction into engineering design course, I was tasked to reverse engineering a wind up toy in order to familiarize myself with the reverse engineering process.
Reverse engineering has 3 main steps
Reverse engineering has 3 main steps
- Visual Analysis - a surface level examination of the products visual aspects
- Functional Analysis - an analysis of the products functions, what can the user input and what is outputted
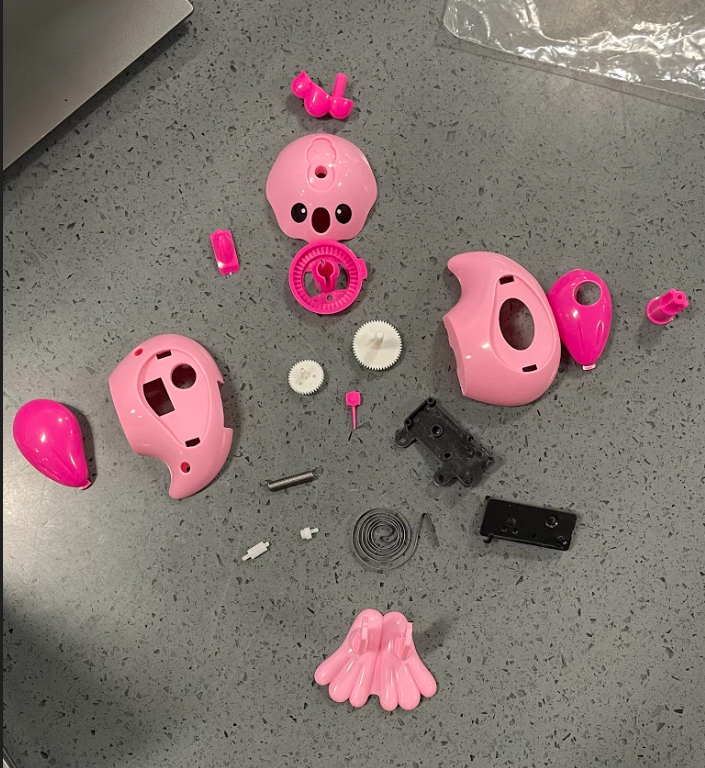
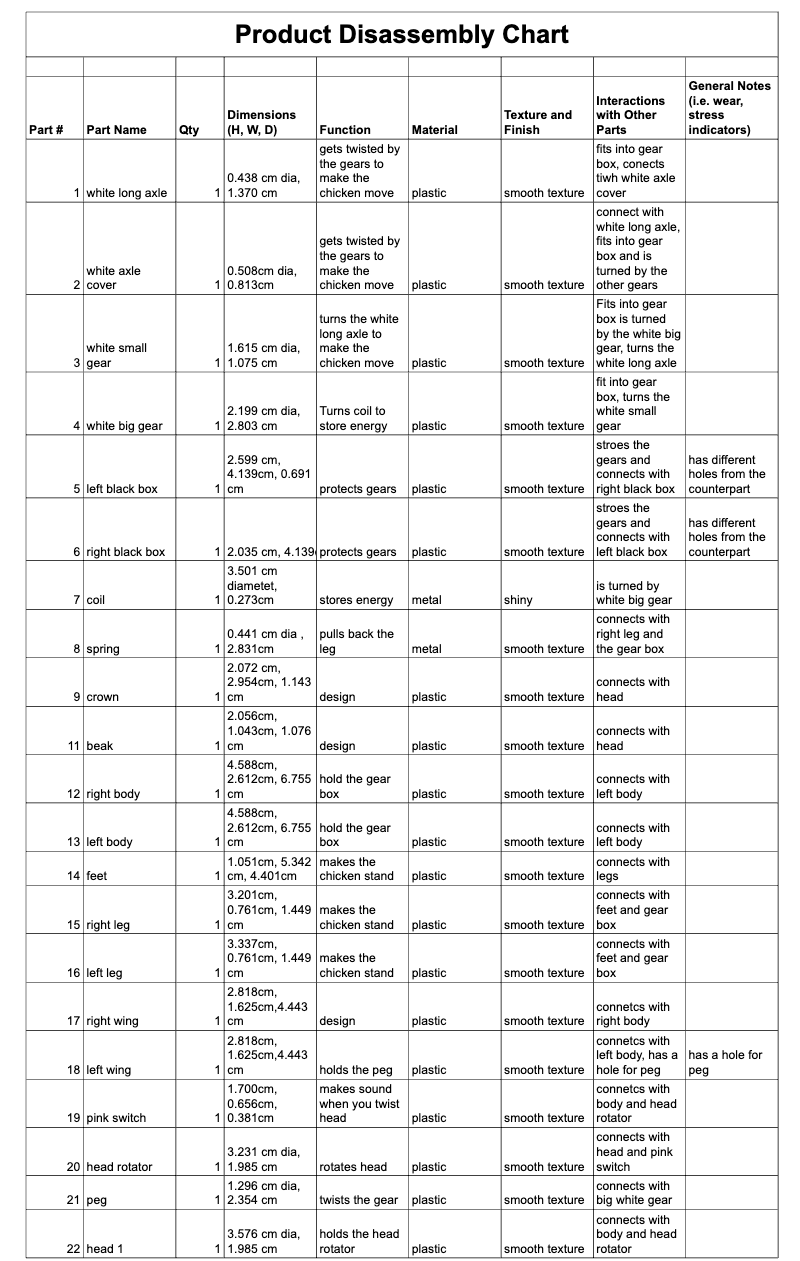
- Structural Analysis - an indepth examination of the parts of the toy, this is when the deconstructing of the toy occurs.
Visual Analysis: Chicken Toy

|

|

|
Top Front Side
|
The top view of the chicken toy demonstrates the contrast of the two different main colors. Each different color is a different part that can be disassembled. The smooth texture of the toy can be seen with the light reflecting on its surface. |
The Front view of the chicken toy shows the proportions of the chicken toy. The top is smaller than the bottom. Additionally the circular shape of the chicken can be best observed in this view. The space between the torso and its legs emphasizes its big feet. The line in the middle creates a balance between both sides of the chicken. |
The side view of the chicken makes its lines clear. In this view you can see more of the colors contrast. The space between the peg and the wing emphasizes that the user can interact with the peg. Additionally the chicken is very economical, its design is communicated in bare minimum differences in color and depth.
|
Functional Analysis: Chicken toy

The chicken works by storing energy in a gear box by turning the peg. Once placed on the surface, the legs will push up releasing the tension inside the gearbox releasing all the energy stored making it move up and down. The movement is controlled by a spring tying the legs and gearbox
Functional Analysis: Chicken toy